Hindu guru goyal : Gardening

Buy 1 get 7 free

Showing posts with label Gardening. Show all posts

Tuesday, August 6, 2024

How to Grow Blueberries in Hot Climates


How to Grow Blueberries in Hot Climates

Author: Shweta Goyal

Introduction

Blueberries are known for their delicious taste and nutritional benefits, but growing them in hot climates can be tricky. With the right strategies, you can successfully cultivate blueberries in warm regions. This guide provides essential tips on how to grow blueberries in hot climates, ensuring you enjoy a bountiful harvest.

Climate and Soil Requirements

Choosing the Right Location

Select a location that receives morning sun and afternoon shade. This helps protect the plants from the intense afternoon heat. Blueberries prefer well-drained, acidic soil with a pH of 4.5-5.5.

Choosing the Right Location for Blueberries - Author: Shweta Goyal

Soil Preparation

Prepare the soil by incorporating organic matter such as peat moss or pine bark. This improves soil structure, drainage, and acidity, creating an ideal environment for blueberry plants.

Soil Preparation for Blueberries - Author: Shweta Goyal

Watering and Mulching

Consistent Watering

In hot climates, maintaining consistent soil moisture is crucial. Water the plants regularly, ensuring the soil remains moist but not waterlogged. Drip irrigation systems can be particularly effective in providing consistent moisture.

Mulching

Apply a thick layer of mulch around the plants to retain soil moisture and regulate soil temperature. Organic mulches like pine needles or wood chips are excellent choices.


Watering and Mulching Blueberries - Author: Shweta Goyal

Providing Shade

Using Shade Cloth

Protect blueberry plants from the scorching sun by using shade cloth. A shade cloth with 30-50% shading can significantly reduce heat stress on the plants.

Natural Shading

Plant taller companion plants, such as sunflowers or corn, to provide natural shading for your blueberries. This method creates a microclimate that is cooler and more conducive to blueberry growth.


Using Shade Cloth for Blueberries - Author: Shweta Goyal

Selecting Heat-Tolerant Varieties

Recommended Varieties

Choose blueberry varieties known for their heat tolerance. Some excellent options include Sharpblue, Misty, and Jewel. These varieties can withstand higher temperatures and still produce high yields.


Heat-Tolerant Blueberry Varieties - Author: Shweta Goyal

Pest and Disease Management

Common Pests

Monitor for common pests such as aphids, spider mites, and birds. Use organic pest control methods like neem oil, insecticidal soap, or bird netting to manage pest populations.


Disease Prevention

Ensure good air circulation around the plants and avoid overhead watering to prevent fungal diseases. Rotate crops and remove any diseased plants promptly to reduce the risk of disease spread.

Harvesting and Post-Harvest Care

Harvesting Tips

Harvest blueberries when they are fully blue and slightly soft. Pick the berries gently to avoid bruising and place them in a shallow container to prevent crushing.

Post-Harvest Storage

Store harvested blueberries in the refrigerator to prolong their freshness. For long-term storage, consider freezing the berries or making preserves.

Conclusion

Growing blueberries in hot climates requires careful planning and management, but it is entirely possible with the right techniques. By selecting heat-tolerant varieties, providing shade, maintaining consistent moisture, and managing pests, you can enjoy a successful blueberry harvest even in warm regions. Happy gardening!

How to Grow Strawberries in Hot Climates


How to Grow Strawberries in Hot Climates

Author: Shweta Goyal

Introduction

Strawberries are a favorite fruit for many, but growing them in hot climates can be challenging. With the right techniques, however, you can successfully cultivate strawberries even in warm regions. This guide will provide you with tips and tricks to grow strawberries in hot climates, ensuring a bountiful harvest of juicy, sweet berries.

Climate and Soil Requirements

Choosing the Right Location

Select a location that receives morning sun and afternoon shade. This helps protect the plants from the intense afternoon heat. Strawberries prefer well-drained, loamy soil with a pH of 5.5-6.5.


Choosing the Right Location for Strawberries - Author: Shweta Goyal

Soil Preparation

Prepare the soil by incorporating organic matter such as compost or well-rotted manure. This improves soil structure, drainage, and nutrient content, creating an ideal environment for strawberry plants.

Soil Preparation for Strawberries - Author: Shweta Goyal

Watering and Mulching

Consistent Watering

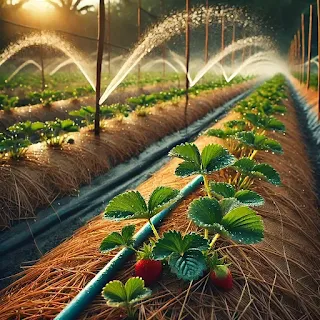
In hot climates, maintaining consistent soil moisture is crucial. Water the plants regularly, ensuring the soil remains moist but not waterlogged. Drip irrigation systems can be particularly effective in providing consistent moisture.

Mulching

Apply a thick layer of mulch around the plants to retain soil moisture and regulate soil temperature. Organic mulches like straw or wood chips are excellent choices.

Watering and Mulching Strawberries - Author: Shweta Goyal

Providing Shade

Using Shade Cloth

Protect strawberry plants from the scorching sun by using shade cloth. A shade cloth with 30-50% shading can significantly reduce heat stress on the plants.

Natural Shading

Plant taller companion plants, such as sunflowers or corn, to provide natural shading for your strawberries. This method creates a microclimate that is cooler and more conducive to strawberry growth.

Using Shade Cloth for Strawberries - Author: Shweta Goyal

Selecting Heat-Tolerant Varieties

Recommended Varieties

Choose strawberry varieties known for their heat tolerance. Some excellent options include Chandler, Seascape, and Quinault. These varieties can withstand higher temperatures and still produce high yields.

Heat-Tolerant Strawberry Varieties - Author: Shweta Goyal

Pest and Disease Management

Common Pests

Monitor for common pests such as aphids, spider mites, and slugs. Use organic pest control methods like neem oil, insecticidal soap, or introducing beneficial insects to manage pest populations.


Disease Prevention

Ensure good air circulation around the plants and avoid overhead watering to prevent fungal diseases. Rotate crops and remove any diseased plants promptly to reduce the risk of disease spread.

Harvesting and Post-Harvest Care

Harvesting Tips

Harvest strawberries when they are fully red and ripe. Pick the berries gently to avoid bruising and place them in a shallow container to prevent crushing.

Post-Harvest Storage

Store harvested strawberries in the refrigerator to prolong their freshness. For long-term storage, consider freezing the berries or making preserves.

Conclusion

Growing strawberries in hot climates requires careful planning and management, but it is entirely possible with the right techniques. By selecting heat-tolerant varieties, providing shade, maintaining consistent moisture, and managing pests, you can enjoy a successful strawberry harvest even in warm regions. Happy gardening!

Monday, August 5, 2024

The Ultimate Guide to Organic Gardening: Tips and Tricks for Beginners


The Ultimate Guide to Organic Gardening: Tips and Tricks for Beginners

1. Introduction to Organic Gardening 🌱

Organic gardening is a method of growing plants without the use of synthetic fertilizers or pesticides. It relies on natural processes and materials to create a healthy, sustainable environment for plants. This approach not only benefits the environment but also produces healthier, tastier fruits and vegetables.


2. Benefits of Organic Gardening 🌿

Organic gardening offers numerous benefits:

  • Healthier produce: Without chemical residues, organic fruits and vegetables are safer to eat.
  • Environmental protection: Organic gardening helps reduce pollution and conserves water and soil quality.
  • Biodiversity: Encourages a diverse ecosystem, attracting beneficial insects and wildlife.
  • Soil health: Improves soil structure and fertility through natural composting and mulching.


3. Soil Preparation 🏡

Preparing the soil is crucial for a successful organic garden. Start by testing your soil to determine its pH and nutrient levels. Add organic matter such as compost, manure, or leaf mold to improve soil texture and fertility. Avoid using chemical fertilizers, as they can harm soil life and structure.

Use mulch to retain moisture, suppress weeds, and add nutrients to the soil. Mulching materials include straw, grass clippings, and shredded leaves. Rotate crops annually to prevent soil depletion and pest buildup.


4. Selecting the Right Plants 🌸

Choosing the right plants for your organic garden involves considering your local climate, soil type, and available sunlight. Opt for native plants and heirloom varieties, which are typically more resilient and adapted to local conditions.

Start with easy-to-grow vegetables like tomatoes, lettuce, and beans. Companion planting, where certain plants are grown together to benefit each other, can help improve growth and deter pests. For example, plant basil near tomatoes to enhance flavor and repel insects.


5. Natural Pest Control Methods 🐞

Managing pests organically involves using natural methods to protect your plants. Encourage beneficial insects like ladybugs and lacewings, which prey on harmful pests. Use barriers such as row covers to keep pests away from crops.

Companion planting can also deter pests. For example, marigolds release a scent that repels nematodes and other harmful insects. Homemade sprays made from garlic, neem oil, or soap can help control pest populations without harming beneficial insects.


6. Sustainable Gardening Techniques 🌍

Sustainability is at the heart of organic gardening. Conserve water by using drip irrigation or soaker hoses, which deliver water directly to plant roots. Collect rainwater in barrels for irrigation during dry periods.

Composting kitchen scraps, garden waste, and other organic materials returns valuable nutrients to the soil. Practice crop rotation and intercropping to maintain soil health and reduce pest and disease problems.

Reduce waste by reusing and recycling garden materials. For example, use old containers for planting, and create trellises from repurposed wood or metal.


7. Common Mistakes to Avoid ❌

While organic gardening is rewarding, it's important to avoid common pitfalls:

  • Overwatering: Too much water can lead to root rot and other issues. Water deeply but infrequently.
  • Ignoring soil health: Regularly add organic matter to maintain soil fertility and structure.
  • Planting too closely: Give plants enough space to grow and access sunlight and air circulation.
  • Neglecting pest control: Regularly inspect plants for signs of pests and take action early.

8. Conclusion and Encouragement for Beginners 🌟

Organic gardening is a fulfilling hobby that benefits both you and the environment. By following these tips and techniques, you can create a thriving, sustainable garden. Remember to start small, be patient, and enjoy the process. Happy gardening!

Hashtags:

#OrganicGardening🌿 #GardeningTips📝 #SustainableGardening🌍 #HealthySoil🌾 #NaturalPestControl🐞 #EcoFriendly🌱 #GardenLife🏡 #GreenThumb🌿 #BackyardGarden🌻 #GrowYourOwn🍅 #Composting♻️ #HeirloomPlants🌼 #Biodiversity🌸 #GardenToTable🍽️ #UrbanGardening🏙️ #Homesteading🚜 #PollinatorFriendly🐝 #OrganicFarming🚜 #GardenGoals🌟 #SoilHealth🌾 #WaterConservation💧 #ZeroWaste🌿 #HealthyLiving💚 #PlantLovers🌸 #GardenInspiration🌟 #NatureLovers🍃 #GreenLiving🌱 #SustainableLiving🌍 #EcoConscious💚 #HealthyHarvest🍇 #OrganicLife🌿 #NontoxicLiving🚫 #NatureFriendly🌸 #GardenTips📝 #HealthyEating🥗 #SelfSufficiency🌾 #LocalFood🍓 #OrganicProduce🍅 #Homegrown🌻 #HealthyPlants🌿 #NaturalLiving🍃 #BackyardFarming🚜 #SoilAmendments🌾 #EcoGarden🌍 #GardenDesign🌸 #PerennialGarden🌼 #HerbGarden🌿 #OrganicHerbs🌿

Tuesday, July 23, 2024

जन्माष्टमी 2024: विशेष उत्सव और अनुष्ठान

जन्माष्टमी 2024 - विशेष उत्सव और अनुष्ठान

1. तुलसी पत्तियों की अर्पण

तुलसी पत्तियाँ भगवान कृष्ण को अर्पित की जाती हैं, जो भक्ति का प्रतीक हैं।

2. दीप जलाना

जन्माष्टमी उत्सव में दीप जलाना महत्वपूर्ण अनुष्ठान है, जो अंधकार और अज्ञानता को दूर करता है।

3. मक्खन और चीनी की अर्पण

भगवान कृष्ण को मक्खन और चीनी बहुत प्रिय थे, और इन्हें अर्पित करना भक्ति और प्रेम का प्रतीक है।

4. सुबह मंदिर की यात्रा

सुबह के समय मंदिर की यात्रा करना आम प्रथा है, जहां भक्त प्रार्थना करते हैं और आशीर्वाद प्राप्त करते हैं।

5. केसर और चंदन का टीका

केसर और चंदन का टीका लगाना देवत्व को आमंत्रित करने का अनुष्ठान है।

6. पीपल के पेड़ को जल अर्पित करना

पीपल के पेड़ को जल अर्पित करने से समृद्धि और सौभाग्य की प्राप्ति होती है।

7. निरंतर अर्पण

भक्त निरंतर भगवान को अर्पण करते हैं, आशीर्वाद और कृपा की प्राप्ति के लिए।

8. कृष्ण को दूध और केसर से अभिषेक

भगवान कृष्ण की मूर्ति को दूध और केसर से अभिषेक करना शुद्धिकरण और पवित्रीकरण का अनुष्ठान है।

9. गायों को खाना खिलाना

जन्माष्टमी उत्सव में गायों को खाना खिलाना एक महत्वपूर्ण कार्य है।

10. कपड़े दान करना

जरूरतमंदों को कपड़े दान करना जन्माष्टमी के दौरान एक पुण्य कार्य माना जाता है।


Saturday, September 15, 2018

बोनसाई बनाने की विधि pdf in hindi at home diy diu (part-1)


बोनसाई बनाने की विधि pdf in Hindi at home easy method diy diu.


बोनसाई बनाने की विधि pdf in Hindi at home easy method diy 


दोस्तों सबसे पहले मैं आपको यह बता दूं की बोनसाई बनाने की विधि कि कोई PDF फाइल नहीं होती है. तो आज मैं आपको बोनसाई बनाने की विधि PDF का पार्ट वन बताने जा रहा हूं अगर आपने मुझे फॉलो नहीं किया है तो कर लीजिए बोनसाई बनाने की विधि PDF का ऐसा ब्लॉग आपने कभी नहीं पढ़ा होगा मैं पूर्ण विस्तार से आपको बोनसाई बनाने की विधि PDF बताने जा रहा हूं तो आइए जानते हैं की बोनसाई ट्री क्या होता है


बोनसाई क्या है ?बोनसाई का मतलब क्या होता है?


जापानी भाषा में बोनसाई का मतलब है "बौने पौधे"। बोनसाई शब्द दो जापानी शब्दों केे मूल (बोन-साई) से बना है. बोन का अर्थ है छिछला पात्र तथा साई का अर्थ है पौधा.

वृक्षों को बौने रूप में विकसित करने, पेड़ों की कलात्मक कटाई-छंटाई करके उन्हें सुंदर रूप देने की यह अद्भूत कला काफी प्राचीन है. बोनसाई में पौधे को छोटा करके मनचाहा आकार दिया जा सकता है, परंतु उसके फलों का आकार नहीं बदला जा सकता. अतः बोनसाई में छोटे-छोटे उगने वाले फल-फूल के पेड़ ही लगाने चाहिए. बोनसाई उन वृक्ष-पौधों की अधिक आकर्षक बन सकती है, जिनकी पत्तियां छोटी, गूदेदार, मोटी और चमकदार हों.


बोनसाई बनाने की विधि pdf लिए तीन प्रमुख बिन्दुओं पर ध्यान देना आवश्यक है:


  1. पौधों का चयन:
  2. पात्र:
  3. बोनसाई की मिट्टी:
तो दोस्तों आज के लिए इतना काफी है आगे मैं आपको बताऊंगा कि बोनसाई बनाने की विधि PDF में आप बोनसाई पौधों का उसके पात्र का और उसकी मिट्टी का चयन कैसे करें और उसे स्थापित कैसे करें तो आपने लाइक और कमेंट नहीं किया तो कर दीजिए और मुझे फॉलो करिए.
धन्यवाद

Sunday, July 29, 2018

DIY how to germinate and grow pistachio seeds in a sweet box at home.


growing pista pistachios ideas

मिठाई के डिब्बे में पिस्ता कैसे उगायें | pistachio seed germination | How to grow pistachio nuts at home in Hindi. Growing Pista, pistachios. DIY how to germinate and grow pistachio seeds in a sweet box at home. growing pista, pistachios ideas.
How to Start Pistachio Trees From Seed
Edible pistachios are commercially produced in the American West.
Related Articles
1
What Climate Will a Pistachio Tree Grow In?
2
Grow Pistachios
3
Grow a Pistachio
4
Pistachio Tree Planting
Edible pistachio (Pistacia vera) provides delicious, highly valued green nuts to eat as snacks or use in cooking. The pistachio is native to western Asia and Asia Minor and grows in U.S. Department of Agriculture plant hardiness zones 8 through 11. Pistachios are a commercial crop primarily in California, but also in New Mexico, Arizona, Nevada, Texas and Utah. Trees are usually grown as grafts on rootstock from other species of Pistacia that furnish disease resistance and more vigorous growth. Fruit is borne only on female trees, but the male is necessary for pollination. Pistachio seeds need cold treatment to germinate. Start the process in November.


1
Place raw seeds in a bowl of tap water that has been allowed to sit out at room temperature for two or three days. Soak the seeds for 16 hours.

2
Fill clean 3-inch pots with the soilless potting mix. Make a 1-inch hol in the centre of the pot and put a seed in it, filling the hol with soil and pressing gently to firm the mix. Water thoroughly.

3
Set the pots in a clean nursery flat. Fill the flat with empty pots if the planted pots don't fill the flat so the pots won't fall over. Put the flat outside in partial sunlight. Keep it watered through the winter.

4
Check the pots for germination as the weather warms in the spring.

Things You Will Need
Water
Bowl
3-inch pots
Soilless potting mix
Nursery flat
Tip
Edible pistachio can have irregular or low germination rates. Horticultural studies show seed germination is greatly improved by soaking the seeds in solutions of 1 per cent potassium nitrate or mild solutions of gibberellic acid and benzyladenine.
Warnings
Don't try to germinate the roasted, salted seeds sold as food. You need raw seeds.
Trees grown from seed often do not produce good yields of nuts. Quality is guaranteed only by grafting proven varieties -- usually the variety Kerman -- onto good rootstock.

बीज से पिस्ता पेड़ कैसे शुरू करें

खाद्य पिस्ता वाणिज्यिक रूप से अमेरिकी पश्चिम में उत्पादित होते हैं।
संबंधित आलेख
1
एक पिस्ता ट्री किस जलवायु में बढ़ेगी?
2
पिस्ता बढ़ो
3
एक पिस्ता बढ़ाओ
4
पिस्ता ट्री रोपण
खाद्य पिस्ता (पिस्ताशिया वेरा) स्नैक्स या खाना बनाने में उपयोग के रूप में खाने के लिए स्वादिष्ट, अत्यधिक मूल्यवान हरे नट प्रदान करता है। पिस्ता पश्चिमी एशिया और एशिया माइनर के मूल निवासी है और यू.एस. विभाग कृषि संयंत्र कठोरता क्षेत्र 8 से 11 तक बढ़ता है। पिस्ता मुख्य रूप से कैलिफ़ोर्निया में एक वाणिज्यिक फसल है, बल्कि न्यू मैक्सिको, एरिजोना, नेवादा, टेक्सास और यूटा में भी है। पेड़ आमतौर पर पिस्तासिया की अन्य प्रजातियों से रूटस्टॉक पर ग्राफ्ट के रूप में उगाए जाते हैं जो रोग प्रतिरोध और अधिक जोरदार वृद्धि प्रदान करते हैं। फल केवल मादा पेड़ों पर पैदा होता है, लेकिन पुरुष परागण के लिए आवश्यक है। पिस्ता के बीज को अंकुरित करने के लिए ठंडे उपचार की आवश्यकता होती है। नवंबर में प्रक्रिया शुरू करें।


1
कच्चे बीज को नल के पानी के कटोरे में रखें जिन्हें दो या तीन दिनों के लिए कमरे के तापमान पर बैठने की अनुमति दी गई है। बीज को 16 घंटे तक भिगो दें।

2
मृदा पॉटिंग मिश्रण के साथ साफ 3-इंच बर्तन भरें। बर्तन के केंद्र में 1 इंच का छेद बनाएं और इसमें एक बीज डालें, मिट्टी के साथ छेद भरें और मिश्रण को मजबूती से दबाएं। पूरी तरह से पानी।

3
एक साफ नर्सरी फ्लैट में बर्तन सेट करें। फ्लैट रोटी के साथ फ्लैट भरें यदि लगाए गए बर्तन फ्लैट को भर नहीं पाते हैं तो बर्तन खत्म नहीं होंगे। आंशिक सूरज की रोशनी में बाहर फ्लैट रखो। इसे सर्दी के माध्यम से पानी में रखें।

4
वसंत ऋतु में मौसम के रूप में अंकुरित के लिए बर्तनों की जांच करें।

चीजें जो आपको चाहिए
पानी
कटोरा
3-इंच बर्तन
मृदा पॉटिंग मिश्रण
नर्सरी फ्लैट
टिप
खाद्य पिस्ता में अनियमित या कम अंकुरण दर हो सकती है। बागवानी अध्ययन से पता चलता है कि बीज अंकुरण 1 प्रतिशत पोटेशियम नाइट्रेट या गिब्बेरेलिक एसिड और बेंजाइलाडेनाइन के हल्के समाधान के समाधान में बीज को भिगोकर काफी सुधार हुआ है।
चेतावनी
भोजन के रूप में बेचे गए भुना हुआ, नमकीन बीज अंकुरित करने की कोशिश न करें। आपको कच्चे बीज की जरूरत है।
बीज से उगाए जाने वाले पेड़ अक्सर नट्स की अच्छी पैदावार नहीं पैदा करते हैं। गुणवत्ता केवल प्राकृतिक किस्मों को तैयार करके गारंटीकृत है - आमतौर पर विविध किर्मन - अच्छे रूटस्टॉक पर।


tags: how to grow pistachios in hindi,pista germination hindi,how to grow pistachios from seed in hindi,how to grow pista at home in hindi,how to grow pista at home,pista seed germination,pistachio seed germination,pista seeds for planting,how to grow pistachios from seed,grow pistachio,how to grow pistachios,grow pista,how to grow pista,pistachio,pista plant,pistachio tree,nuts,seed,how to grow,how to grow pista plant,seeds,how to,growing,germinate,grow,diy,diu.

Friday, July 27, 2018

how to grow walnut tree from seed


akhrot (अखरोट) kaise ugaye. how to grow the walnut tree from seed. walnuts growing ideas gardening tips.


 How to Plant a Walnut TreeThree Parts:Preparing Walnuts for PlantingPlanting the WalnutsPlanting and Caring for Walnut TreesCommunity Q&A While there are several species of walnut, most notably the black walnut and English walnut, basic planting and care instructions are all similar. Still, due to the existence of hundreds of varieties adapted to different climates and disease resistance, planting nuts from relatively nearby is recommended. Walnut trees can produce flavorful nuts and durable, attractive timber, but home gardeners should be aware that they often kill nearby plants! Also, keep in mind that walnut trees don’t start producing nuts until about 10 years after they have been planted and the nut production will peak at about 30 years after planting. You can plant walnut trees from nuts, which are often free to collect but tedious to prepare, or seedlings, which usually need to be purchased but typically have a higher success rate. amazon affiliate program - to buy hydrogen peroxide in India: https://amzn.to/2AbPPDU to buy hydrogen peroxide in us: https://amzn.to/2uOlLJo to buy hydrogen peroxide in UK: https://amzn.to/2mJ1r7X to buy hydrogen peroxide in Canada: https://amzn.to/2NJRgv3 Part1 Preparing Walnuts for Planting 1 Understand the effort involved, and the risks to your garden. Preparing walnut seeds can take months of waiting, and success rate can be low. You may choose to purchase a seedling and skip to that section instead. Before using either method, be aware that walnut trees, especially of the black walnut species, release chemicals into the soil that kill many nearby plants, including pine trees, apple trees, tomatoes, and others.[1] This, along with their massive size and sometimes aggressive spreading of new walnut plants, can make them unpopular in cities and suburbs.[2] Image titled Plant Walnuts Step 1 2 Collect fallen walnuts. In the autumn, gather nuts that have fallen from walnut trees, or gently hit walnut branches with a PVC pipe to cause ripe nuts to fall.[3] Even when ripe and fallen, most nuts will still be encased in a thick green or brown husk around the nutshell. Warning: walnut husks can stain and irritate skin and clothing. Waterproof gloves are recommended. Image titled 1555191 3 3 Purchase walnuts instead. If you plan to start a walnut orchard to produce nuts or timber, ask a local forester or look online for a species and variety specialized for your climate and your intended purpose. Ideally, purchase walnut seed from trees within 100 miles (160 km) of your planting location, as these may be better adapted.[4] Walnuts typically grow in USDA hardiness zones 4—9, or areas with a -30 to +30ºF (-34 to -1ºC) minimum temperature, but some varieties are better suited to cold than others. Black walnut is highly expensive and in-demand for its timber, while English walnut (also called Persian walnut) is commonly grown for either nuts or timber. Many varieties of each exist, along with other, less widely available species.[5] Walnuts from a grocery store are unlikely to have the moisture necessary to germinate. Even if they do, the nuts were likely produced by a hybrid tree or a tree variety suited for a different climate, making success in your area unlikely. Image titled Plant Walnuts Step 2 4 Remove the husks (optional). Walnuts can grow without the husks being removed, but many people remove the husks to check the walnuts inside are undamaged, and to make them easier to handle. To remove the husk, soak the walnuts in a bucket of water until the outer husk is soft to the touch, waiting up to three days for the hardest nuts. Crack and peel off the softened husk by hand.[6] If the husks have dried out, they can be almost impossible to remove. Try driving over them in a car. For a larger quantity of walnuts, run them through a corn sheller, or even rotate them in a cement mixer with gravel and water for 30 minutes.[7] Image titled Plant Walnuts Step 3 5 Keep the nuts moist over the winter, for 90–120 days. Walnuts, like many plant seeds, need to experience a moist, cold environment before the plant awakens from its dormancy and emerges from the shell. This takes 3–4 months for walnuts, depending on the variety, during which they should be kept moist. Keeping seeds in an environment for this purpose is called stratification, and for walnuts can be done in one of the following ways: Keep small amounts of walnuts in moist peat moss or moist sand, inside plastic bags kept in a refrigerator, or in another location between 34 and 41ºF (2–5ºC).[8] For a large number of nuts, dig a pit in fast-draining soil, 1 to 2 feet (.3 to .6 meters) deep. Fill this pit by alternating single layers of nuts with 2 inches (5 cm) layers of sand, leaves, or mulch. Cover the pit with screening to keep out rodents.[9][10]. akhrot (अखरोट) kaise ugaye. how to grow a walnut tree from seed. walnuts growing idea gardening tips.


Category : Howto & Style
tags: walnut tree, walnut tree from seed, gardening ideas, how to, in hindi, tree, walnut, how to grow walnut tree, grow, growing, growing ideas, gardening tips, gardening, garden, at home, how to grow, walnuts, grow walnut tree, grow walnut from seed, grow walnut tree from seed, grow walnut tree from nut, akhrot kaise ugaye, अखरोट, benefits of walnuts, akhrot ke fayde, plants, plant, seed, seeds, hydrogen peroxide for seed germination, hydrogen peroxide,

Sunday, March 11, 2018

How to grow turmeric root at home | haldi kaise ugaye | हल्दी कैसे उगाये | How to plant turmeric |

Haldi is the plant of Jinjivarani Kuli. Its botanical name is Kurama Langa. It originated in Southeast Asia. Turmeric has been used in various forms since ancient times because colour smelling and medicinal properties are found in it. Turmeric has both properties of bio-protection and bio-destruction because it protects the fibres and kills bacteria (bacteria). As well as being in medicinal form, its use in all the goodwill in the society is being used since ancient times. At present, the best cosmetic products are being made from turmeric. Turmeric is found in Krumins and aliorozins are also taken out. Turmeric contains the highest amount of starch, In addition, 13.1 per cent water, 6.3 per cent protein, 5.1 per cent fat, 69.4 per cent carbohydrate, 2.6 per cent filament and 3.5 per cent mineral salts are found in the nutrients. There is 1.3 to 5.5 per cent of the vintage orange-red oil.

India is the largest turmeric producing country in the world. In India, turmeric is exported in various forms to Japan, France, USA, United Kingdom, Germany, Netherlands, Saudi Arabia and Australia. Mph The area of Turmeric is very low, but there is a strong possibility of its area and production growth here.
for more details watch my complete video about how to grow turmeric root or rhizome at home in Hindi.


A Complete Guide to Sally Beauty’s Hair Color Range: Top Brands and Expert Tips

  A Complete Guide to Sally Beauty’s Hair Color Range: Top Brands and Expert Tips Author: Shweta Goyal Introduction Hair color i...